用vite的方式开发electron应用
vite的构建方式让前端人员的编程体验好了太多,最近在学习electron应用的开发,就在想能不能使用vite的方式开发electron应用。看了很多方案,大部分都是基于webpack的脚手架。
那么有没有一种方式能够将vite结合electron,来开发electron应用呢?答案当然是有的,作为electron与vite整合开源方案中最火的项目:vite-plugin-electron 。本文将基于这个项目的实现思路,详细记录如何编写vite插件并在最终手写一个vite插件,实现用vite的方式开发electron应用这么一个小目标。
阅读本文前你需要对vite有一个基本的认识,否则你将对一些内容感到一头雾水。如果你对vite的插件开发有兴趣的话,请一定耐心阅读完本文,干货满满。
在本文中我将提到以下几点:
vite插件的基础知识与简单应用electron应用开发的入门vite整合electron应用开发的思路- 编写
vite插件实现vite与electron应用的整合
vite插件的基础知识与简单应用
vite插件的用途简单来说就是帮助我们在vite构建的不同生命周期中执行我们需要的业务逻辑,这有时候对我们很重要。vite针对这些生命周期暴露出了很多对应的生命周期函数钩子,我们只需要实现这些钩子函数即可。
vite的生命周期
vite的生命周期分为两种:rollup的生命周期和vite特有的生命周期。
通用钩子
我们知道vite项目打包时底层依赖的是rollup,而rollup打包过程是有自己的一套生命周期的,vite为了与其保持一致,故保留了相应的生命周期钩子,这些称作通用钩子。
服务启动时被调用:
options:这是构建阶段的第一个钩子,用于替换或操作传递给 rollup.rollup 的选项对象buildStart:可获取rollup.rollup 的选项对象
传入每个模块请求时被调用:
服务器关闭时被调用:
buildEnd:在 Rollup 完成产物但尚未调用 generate 或 write 之前调用closeBundle:bundle.close()后最后一个触发的钩子,一般可用于清理可能正在运行的任何外部服务
vite特用的钩子
config
在解析 vite配置前调用,它可以返回一个将被深度合并到现有配置中的部分配置对象,或者直接改变配置(如果默认的合并不能达到预期的结果)。
1
2
3
4
5
6
7
8
9
10
11
12
13
14
15
16
17
18
19
20
21
|
const partialConfigPlugin = () => ({
name: 'return-partial',
config: () => ({
resolve: {
alias: {
foo: 'bar',
},
},
}),
})
const mutateConfigPlugin = () => ({
name: 'mutate-config',
config(config, { command }) {
if (command === 'build') {
config.root = 'foo'
}
},
})
|
configResolved
在解析 Vite 配置后调用。使用这个钩子读取和存储最终解析的配置。
1
2
3
4
5
6
7
8
9
10
11
12
13
14
15
16
17
18
19
20
21
| const examplePlugin = () => {
let config
return {
name: 'read-config',
configResolved(resolvedConfig) {
config = resolvedConfig
},
transform(code, id) {
if (config.command === 'serve') {
} else {
}
},
}
}
|
是用于配置开发服务器的钩子,最常见的用例是在内部 connect 应用程序中添加自定义中间件。
connect应用程序是一个中间件层,可往其中添加很多中间件
中间件可简单理解为一个函数或拦截器,请求在进入正式的业务逻辑前,会先被中间件链(拦截器链)处理。
1
2
3
4
5
6
7
8
| const myPlugin = () => ({
name: 'configure-server',
configureServer(server) {
server.middlewares.use((req, res, next) => {
})
},
})
|
其余不常用的钩子
configurePreviewServertransformIndexHtmlhandleHotUpdate
vite的简单应用
首先通过vite的官方模板创建一个vite项目
编写一个简单的插件,插件的作用只是在各个生命周期钩子被调用时打印内容和参数,代码如下:
1
2
3
4
5
6
7
8
9
10
11
12
13
14
15
16
17
18
19
20
21
22
23
24
25
26
27
28
29
30
31
32
33
34
35
36
37
38
39
40
|
import { Plugin } from "vite";
interface FeatureTestOption {
}
export default (option: FeatureTestOption): Plugin => {
return {
name: 'featureTest',
options: (curOpt) => {
console.log('通用钩子options被调用!参数为:',curOpt)
console.log('==========================================================')
},
buildStart:(curOpt)=>{
console.log('通用钩子buildStart被调用!参数为:',curOpt)
console.log('==========================================================')
},
buildEnd:()=>{
console.log('通用钩子buildEnd被调用!')
console.log('==========================================================')
},
closeBundle:()=>{
console.log('通用钩子closeBundle被调用!')
console.log('==========================================================')
},
config:(cfg,env)=>{
console.log('vite特有的钩子config被调用!参数config为:',cfg,'参数env为:',env)
console.log('==========================================================')
},
configResolved:(cfg)=>{
console.log('vite特有的钩子configResolve被调用!参数config为:',cfg)
console.log('==========================================================')
},
configureServer:(server)=>{
console.log('vite特有的钩子configureServer被调用!参数server:',server)
console.log('==========================================================')
}
}
}
|
我们使用typesecipt进行开发来获取更好的代码提示。开发一个插件其实很简单,就是要定义一个类型为Plugin的对象,但是为了更好的扩展性,插件约定俗成的写法是通过函数返回Plugin类型的对象,同时函数接收一个插件参数对象。
生命周期的钩子在Plugin类型对象中都有一一对应的属性,属性值为一个函数,我们的工作就是编写这些函数。
接下来,我们要在vite配置中引入我们编写的插件
1
2
3
4
5
6
7
8
9
10
11
12
|
import { defineConfig } from 'vite'
import vue from '@vitejs/plugin-vue'
import myVitePlugin from './plugins/vite-plugin-featureTest'
export default defineConfig({
plugins: [
vue(),
myVitePlugin({})
],
})
|
在plugins数组中调用插件暴露的函数即可。
最后观察结果:
1
2
3
4
5
6
7
8
9
10
11
12
13
14
15
16
17
18
19
20
21
22
23
24
25
26
27
28
29
30
31
32
33
34
35
36
37
38
39
40
41
42
43
44
45
46
47
48
| PS C:\Users\huanghe\others\vscode-projects\learnElectronAndVite\vite-project> npm run dev
> vite-project@0.0.0 dev
> vite
vite特有的钩子config被调用!参数config为: {
plugins: [
{
name: 'vite:vue',
api: [Object],
handleHotUpdate: [Function: handleHotUpdate],
config: [Function: config],
configResolved: [Function: configResolved],
configureServer: [Function: configureServer],
buildStart: [Function: buildStart],
resolveId: [AsyncFunction: resolveId],
load: [Function: load],
transform: [Function: transform]
},
....省略...
}
参数env为: {
mode: 'development',
command: 'serve',
isSsrBuild: false,
isPreview: false
}
==========================================================
vite特有的钩子configResolve被调用!参数config为: {
....省略....
}
==========================================================
通用钩子options被调用!参数为: {}
==========================================================
vite特有的钩子configureServer被调用!参数server: {
...省略...
}
==========================================================
通用钩子buildStart被调用!参数为: {}
==========================================================
VITE v5.0.10 ready in 659 ms
➜ Local: http:
➜ Network: use --host to expose
➜ press h + enter to show help
|
从最后的结果中我们可以发现,我们定义的函数分别在vite构建过程的不同阶段被调用。
有个特别的点我专门记录下:
configResolved阶段能获取最终的config,从中我们发现了很多不是我们配置的plugin,这些是vite帮我们注入的。
1
2
3
4
5
6
7
8
9
10
11
12
13
14
15
16
17
18
19
20
21
22
23
24
25
26
27
28
29
30
31
32
33
34
35
36
37
38
39
40
41
42
43
44
45
46
47
48
49
50
51
52
53
54
55
56
57
58
59
60
61
62
63
64
65
66
67
68
69
70
71
72
73
74
75
76
77
78
79
80
81
82
83
84
85
| plugins: [
{
name: 'vite:optimized-deps',
resolveId: [Function: resolveId],
load: [AsyncFunction: load]
},
{
name: 'vite:watch-package-data',
buildStart: [Function: buildStart],
buildEnd: [Function: buildEnd],
watchChange: [Function: watchChange],
handleHotUpdate: [Function: handleHotUpdate]
},
{ name: 'vite:pre-alias', resolveId: [AsyncFunction: resolveId] },
{
name: 'alias',
buildStart: [AsyncFunction: buildStart],
resolveId: [Function: resolveId]
},
{
name: 'vite:modulepreload-polyfill',
resolveId: [Function: resolveId],
load: [Function: load]
},
{
name: 'vite:resolve',
resolveId: [AsyncFunction: resolveId],
load: [Function: load]
},
{
name: 'vite:html-inline-proxy',
resolveId: [Function: resolveId],
load: [Function: load]
},
{
name: 'vite:css',
configureServer: [Function: configureServer],
buildStart: [Function: buildStart],
transform: [AsyncFunction: transform]
},
{
name: 'vite:esbuild',
configureServer: [Function: configureServer],
buildEnd: [Function: buildEnd],
transform: [AsyncFunction: transform]
},
{ name: 'vite:json', transform: [Function: transform] },
{
name: 'vite:wasm-helper',
resolveId: [Function: resolveId],
load: [AsyncFunction: load]
},
{
name: 'vite:worker',
configureServer: [Function: configureServer],
buildStart: [Function: buildStart],
load: [Function: load],
shouldTransformCachedModule: [Function: shouldTransformCachedModule],
transform: [AsyncFunction: transform],
renderChunk: [Function: renderChunk],
generateBundle: [Function: generateBundle]
},
{
name: 'vite:asset',
buildStart: [Function: buildStart],
configureServer: [Function: configureServer],
resolveId: [Function: resolveId],
load: [AsyncFunction: load],
renderChunk: [Function: renderChunk],
generateBundle: [Function: generateBundle]
},
{
name: 'vite:vue',
api: [Object],
handleHotUpdate: [Function: handleHotUpdate],
config: [Function: config],
configResolved: [Function: configResolved],
configureServer: [Function: configureServer],
buildStart: [Function: buildStart],
resolveId: [AsyncFunction: resolveId],
load: [Function: load],
transform: [Function: transform]
},
...省略...
],
|
electron应用开发的入门
Electron是一个使用 JavaScript、HTML 和 CSS 构建桌面应用程序的框架。
Electron将Chromium和Node.js嵌入到应用中,因此可以使用他们的特性,并天然的拥有跨平台的特性。
electron技术的核心概念
electron使用的是多进程架构,分为主进程和渲染进程。
主进程
主进程在 Node.js 环境中运行,这意味着它具有 require 模块和使用所有 Node.js API 的能力。
Electron封装了很多原生API,这使得在主进程中有操控原生桌面功能的能力,例如菜单、对话框以及托盘图标。
渲染器进程
每个 Electron 应用都会为每个打开的 BrowserWindow ( 与每个网页嵌入 ) 生成一个单独的渲染器进程。 洽如其名,渲染器负责 渲染 网页内容。 所以实际上,运行于渲染器进程中的代码是须遵照网页标准的。因此渲染器进程中运行的代码,与web应用的开发方式是完全一致的。
渲染器进程可以完整的使用nodejs的api,但是出于安全考虑,这项特性现在已经被默认禁用。
electron应用快速入门
我们来编写一个electron应用的hello-world案例,了解如何开发electron应用。
electron是基于nodejs的,老生常谈的nodejs项目的初始化流程就此跳过了。
安装electron框架的依赖
1
| npm install --save-dev electron
|
package.json中新增一条script命令,将main属性中指定为main.js
1
2
3
4
5
6
7
8
9
10
11
12
13
14
15
16
17
| {
"name": "electron-helloworld",
"version": "1.0.0",
"description": "",
"main": "main.js",
"scripts": {
"test": "echo \"Error: no test specified\" && exit 1",
"dev":"electron ."
},
"keywords": [],
"author": "",
"license": "ISC",
"devDependencies": {
"electron": "^28.0.0"
}
}
|
我们新增了一条dev命令,内容为electron .
electron应用启动的时候默认会取main属性中指定的js文件作为主进程的逻辑
编写main.js文件,其将在主进程中执行,具有完全的nodejs api的能力
1
2
3
4
5
6
7
8
9
10
11
12
13
14
15
16
17
18
19
20
21
22
23
24
25
26
27
28
29
30
31
32
33
34
35
36
37
38
39
|
const { app, BrowserWindow } = require('electron')
const createWindow = () => {
const mainWindow = new BrowserWindow({
width: 800,
height: 600,
webPreferences: {
}
})
mainWindow.loadFile('index.html')
}
app.whenReady().then(() => {
createWindow()
app.on('activate', () => {
if (BrowserWindow.getAllWindows().length === 0) createWindow()
})
})
app.on('window-all-closed', () => {
if (process.platform !== 'darwin') app.quit()
})
|
我们来看一下main.js文件的内容:
引入app和BrowserWindow模块,
app模块负责控制应用程序的事件生命周期BrowserWindow模块,它创建和管理应用程序 窗口
添加一个createWindow()方法来将index.html加载进一个新的BrowserWindow实例
1
2
3
4
5
6
7
8
9
10
11
12
13
| const createWindow = () => {
const mainWindow = new BrowserWindow({
width: 800,
height: 600,
webPreferences: {
}
})
mainWindow.loadFile('index.html')
}
|
在 Electron 中,只有在 app 模块的 ready 事件被激发后才能创建浏览器窗口。 您可以通过使用 app.whenReady() API来监听此事件。 在whenReady()成功后调用createWindow()。
1
2
3
| app.whenReady().then(() => {
createWindow()
})
|
当所有的窗口都关闭,app则退出,electron相关进程都结束。
编写index.html,作为浏览器窗口渲染的内容
1
2
3
4
5
6
7
8
9
10
11
| <!DOCTYPE html>
<html lang="en">
<head>
<meta charset="UTF-8">
<meta name="viewport" content="width=device-width, initial-scale=1.0">
<title>home</title>
</head>
<body>
<h1>hello electron</h1>
</body>
</html>
|
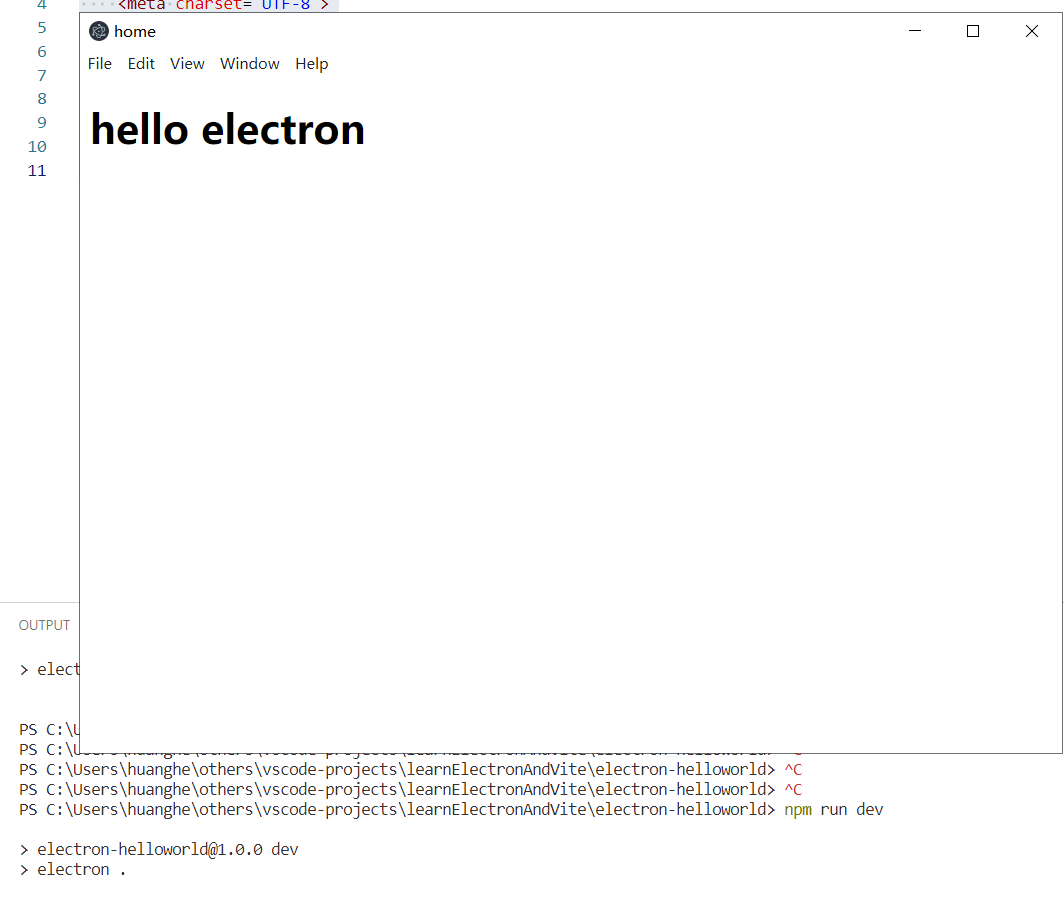
最后,我们启动项目看一看效果

vite整合electron开发的思路
在分析整合思路前我们先梳理下vite和electron各自的开发模式:
vite在开发阶段使用dev-server预览项目,其会提供一个url地址。部署阶段将项目打包成静态资源,包括html,js和css等等。
electron主进程中运行的代码是在Nodejs环境中,渲染进程运行的代码可以认为在浏览器环境中,浏览器窗口中加载的渲染内容可以选择是html静态资源也可以是一个url地址,如下:
1
2
3
4
|
win.loadURL(VITE_DEV_SERVER_URL)
win.loadFile(path.join(process.env.DIST, 'index.html'))
|
那么在分析vite整合electron进行开发的方案时,我们就可以设想以下的思路:
- 在开发阶段,
electron渲染进程通过访问vite的dev-server暴露的url来加载内容
- 在部署阶段,
electron通过vite的构建产物加载内容
为了验证这种思路,我们分别基于vite和electron创建两个项目。
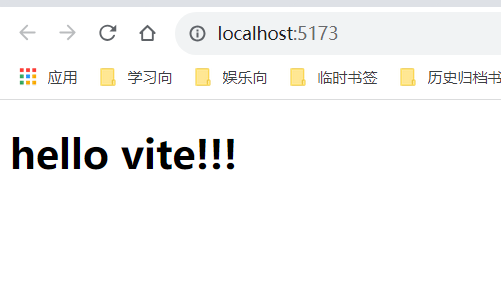
开发阶段:我们启动vite项目,vite的dev-server提供的url是http://localhost:5173/,通过浏览器访问呈现的内容是:**hello vite!!!**

接着,我们进入electron项目,并将这个url写入electron的主进程代码中,
1
| win.loadURL("http://localhost:5173/")
|
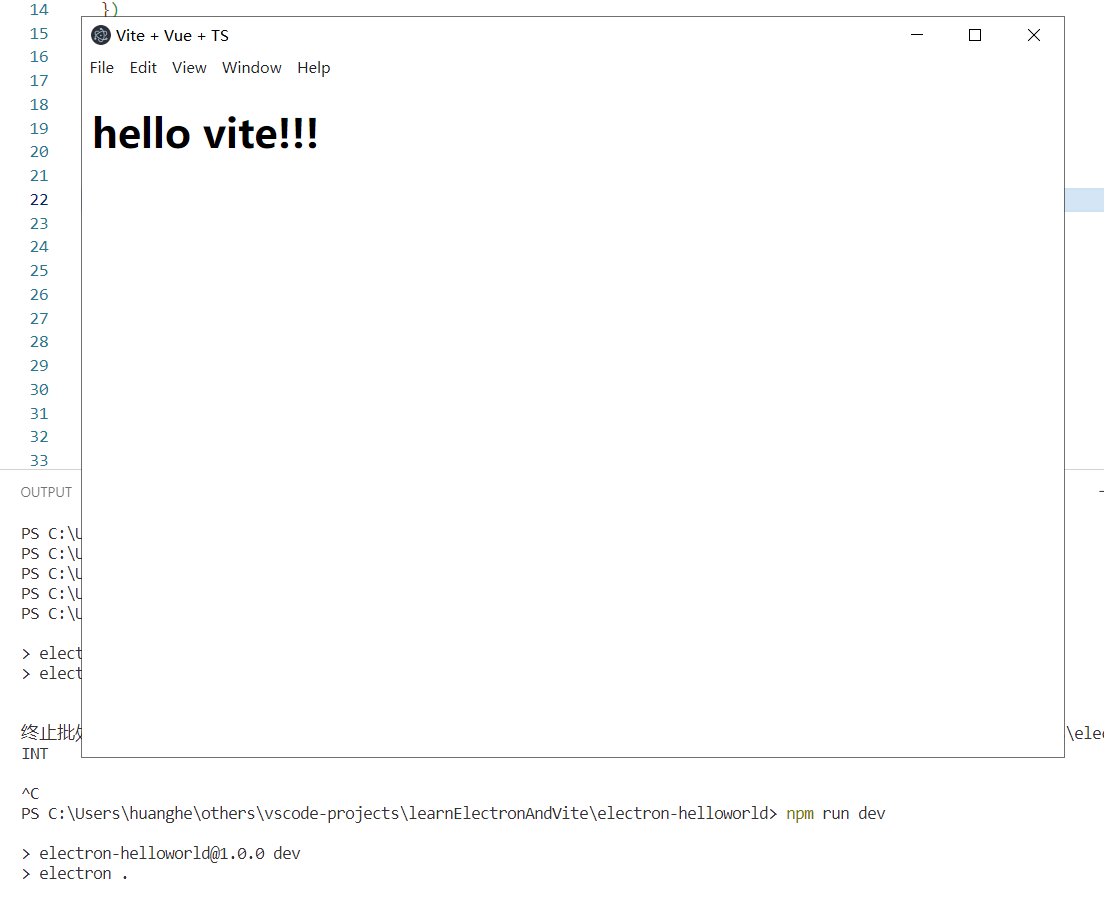
随后我们启动electron应用,效果如下:

直接成功了!electron中呈现的也是:hello vite!!!
部署阶段,过程也是类似,但是因为是两个项目过程较繁琐,我们跳过。
通过上述的实验,可以证明方案是可行的。但通过两个项目的方式开发electron应用终究是不优雅的,因此我们要探究一种能将这个思路完美整合到vite项目中的方式。
所幸vite的插件功能为我们提供了整合的可能性,接下来我们将探寻如何通过vite的插件,实现完美的基于vite的electron开发方案。
通过vite插件实现vite与electron的整合
我们通过开发一个vite插件的方案来实现vite方式开发electron应用,我们将分为两种场景分别应对,一个是开发阶段,一个是编译阶段。
开发阶段
首先是开发阶段,核心的思想就是让vite先通过dev-server的方式跑起来,并获取其url信息,再通过子进程的方式将electron应用启动,然后electron应用的渲染进程加载vite的dev-server的内容。
落地到vite插件的实现上,我们可以通过configSever钩子,获取到vite的dev-server的配置信息,并从中获取启动的url地址,然后保存到环境变量process.env中。我们通过监听dev-server的listening事件,保证在vite完全启动后,再使用spawn执行electron . 命令,启动electron应用。
1
2
3
4
5
6
7
8
9
10
11
12
13
14
15
16
17
18
19
20
21
22
23
24
25
26
27
28
29
30
31
32
33
34
35
36
37
38
| import { ChildProcess } from "child_process";
import { AddressInfo } from "net";
import { Plugin } from "vite";
interface MyElectronOption {
}
let electronApp: ChildProcess
export default (option: MyElectronOption): Plugin => {
console.log('electron的vite-plugin开始执行...........')
return {
name: 'myElectronPlugin',
configureServer: (server) => {
let httpServer = server.httpServer!
httpServer.once('listening', () => {
let addressInfo = httpServer.address() as AddressInfo
let url = `http://${addressInfo.address}:${addressInfo.port}`
console.log(`vite启动服务的url信息是:${url}`)
Object.assign(process.env, { VITE_DEV_SERVER_URL: url })
startElectron()
})
}
}
}
const startElectron = async () => {
const { spawn } = await import('node:child_process')
const electron = await import('electron')
let electronPath = electron.default + ''
console.log(`开始启动electron应用!启动命令为:${electronPath}`)
electronApp = spawn(electronPath, ['.'], { stdio: 'inherit' })
electronApp.once('exit', () => {
process.exit()
})
}
|
我们在App.vue中写了如下要呈现的内容
1
2
3
4
5
6
7
8
9
10
11
| <script setup lang="ts">
</script>
<template>
<h1>hello vite+electron!!!</h1>
</template>
<style scoped>
</style>
|
来看看启动的效果

看到结果,惊喜万分!!我们已经初步实现了通过vite的方式开发electron应用!!!并且当我们改变前端内容时,也是支持热加载的。
但是,如果我们改变了electron主进程的内容则不支持热加载,并且如果我们希望通过ts的方式编写主进程代码也不支持的,那么我们接下来针对这些痛点进行优化。
优化插件
我们通过更改vite的配置并手动调用vite的build方法即可将指定的文件进行预构建。
优化后的代码如下:
1
2
3
4
5
6
7
8
9
10
11
12
13
14
15
16
17
18
19
20
21
22
23
24
25
26
27
28
29
30
31
32
33
34
35
36
37
38
39
40
41
42
43
44
45
46
47
48
49
50
51
52
53
54
55
56
57
58
59
60
61
62
63
64
65
66
67
68
69
70
71
72
73
74
75
76
77
78
79
80
81
82
83
84
85
86
87
88
89
90
91
92
93
94
95
96
97
98
99
100
101
102
103
104
105
106
107
108
109
110
| import { ChildProcess } from "child_process";
import { AddressInfo } from "net";
import { Plugin, InlineConfig, mergeConfig, build as viteBuild } from "vite";
import { builtinModules } from 'node:module'
interface MyElectronOption {
vite: InlineConfig
}
let defaultViteConfig: InlineConfig = {
configFile: false,
publicDir: false,
build: {
lib: {
entry: 'electron/main.ts',
formats: ['cjs'],
fileName: () => '[name].js'
},
outDir: 'dist-electron',
emptyOutDir: false,
watch: {},
minify: false
},
plugins: []
}
let electronApp: ChildProcess
let refreshFlag: boolean = false
let firstFlag:boolean = true
export default (option: MyElectronOption): Plugin => {
console.log('electron的vite-plugin开始执行...........')
return {
name: 'myElectronPlugin',
configureServer: (server) => {
let httpServer = server.httpServer!
httpServer.once('listening', () => {
let addressInfo = httpServer.address() as AddressInfo
let url = `http://${addressInfo.address}:${addressInfo.port}`
console.log(`vite启动服务的url信息是:${url}`)
Object.assign(process.env, { VITE_DEV_SERVER_URL: url })
defaultViteConfig.mode = server.config.mode
defaultViteConfig.plugins.push({
name: 'startElectron',
closeBundle: () => {
console.log('主进程代码重新构建完毕,开始启动electron应用......')
if(firstFlag){
firstFlag = false
}else{
refreshFlag = true
}
startElectron()
}
})
let viteConfig: InlineConfig = withExternalBuiltins(mergeConfig(defaultViteConfig, option.vite))
viteBuild(viteConfig)
})
}
}
}
const startElectron = async () => {
if (electronApp) {
electronApp.kill()
}
const { spawn } = await import('node:child_process')
const electron = await import('electron')
let electronPath = electron.default + ''
console.log(`开始启动electron应用!启动命令为:${electronPath}`)
electronApp = spawn(electronPath, ['.'], { stdio: 'inherit' })
electronApp.once('exit', () => {
if (!refreshFlag) {
process.exit()
}
refreshFlag = false
})
}
const withExternalBuiltins = (config: InlineConfig): InlineConfig => {
const builtins = builtinModules.filter(e => !e.startsWith('_')); builtins.push('electron', ...builtins.map(m => `node:${m}`))
config.build ??= {}
config.build.rollupOptions ??= {}
let external = config.build.rollupOptions.external
if (
Array.isArray(external) ||
typeof external === 'string' ||
external instanceof RegExp
) {
external = builtins.concat(external as string[])
} else if (typeof external === 'function') {
const original = external
external = function (source, importer, isResolved) {
if (builtins.includes(source)) {
return true
}
return original(source, importer, isResolved)
}
} else {
external = builtins
}
config.build.rollupOptions.external = external
return config
}
|
我们在electron/main.ts中编写electron主进程的逻辑,并通过vite构建到dist-electron/main.js下。因为electron识别的是js文件,我们还要将package.json中的main属性调整至:dist-electron/main.js
经过这个优化我们实现了以下特性:
- 只要我们调整了
electron/main.ts的内容,electron会自动重启并且不退出vite服务
- 只要我们关闭
electron应用,vite服务也会自动退出
小结
至此,我们通过vite插件的方式,已经基本实现了通过vite的方式开发electron应用这个目标,也就是我们完全可以按照原先开发web应用的方式来开发electron应用了。
关于构建场景下vite插件的实现,有空了再来详细记录填坑。
vite插件的实现方案参考的是vite-plugin-electron ,有兴趣的小伙伴可到他的仓库地址详细阅读源码。
关于本文中的所有代码,均已上传:github仓库:learnElectronAndVite
欢迎访问的我的个人博客:https://huanglusong.github.io/
欢迎加入我创建的qq技术交流群:624017389
引用
vite官方中文文档
Electron官方中文文档
vite-plugin-electron


